Thursday, December 20, 2012
The Best Bangla Font: Siyam Rupali
সিয়াম রূপালী / শ্যাম রূপালী (Siyam Rupali) ফন্ট অভ্র ফ্রী বাংলা ফন্ট প্রকল্পের অধীন বিকশিত হয়েছে । এখনো পর্যন্ত আমি যত বাংলা ফন্ট ব্যবহার করেছি, সিয়াম রূপালী (Siyam Rupali) সেরা বাংলা ফন্ট । সত্যিই এখনো পর্যন্ত ভাল বাংলা ফন্টের আকাল রয়েছে । বাংলা অক্ষরের "মাত্রা" বাংলা ফন্টকে খুব ছোট দেখাতে বাধ্য করে । এই কারণে বাংলা ফন্টের পাঠযোগ্যতা মুশ্কিল হয়ে দাড়ায়। সিয়াম রূপালী ফন্ট, রূপালী বাংলা ফন্টের একটি পরিবর্তিত রূপ। মোঃ তানবিন ইসলাম Siyam পূর্বোক্ত সমস্যাগুলো সমাধান করেছেন। আপনি এই ফন্ট ব্যবহার করে মেসেঞ্জারে চ্যাট করতে পারেন - 'ছোট ফন্ট সাইজ' কোনো সমস্যা হবে না.
Avro Phonetic Bangla typing for Linux
Many of us have used Avro keyboard , the amazing bangla phonetic keyboard on windows. Folks like me who want to do everything under linux environment now have good news. Omnicronlab now started supporting my favorite linux distro Ubuntu. If you are running Ubuntu 12.10 or Ubuntu 12.04 LTS you can easily install this amazing application by simply adding their repo to your ubuntu install.
Installing ibus-avro on Ubuntu 12.10:
Open Terminal and enter the following commands one by one.Step 1: Add ibus-avro repository
$ sudo add-apt-repository "deb http://download.opensuse.org/repositories/home:/sarimkhan/xUbuntu_12.10/ ./"
Step 2: Add key
Step 3: Update package list
Step 4: Install ibus-avro
Using ibus-avro
- Run IBus (
Applications -> System Tools -> IBus) from Dash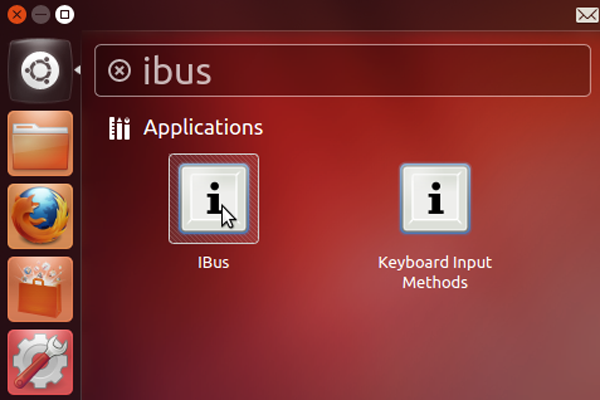
- Open IBus
Preferencesfrom the top panel icon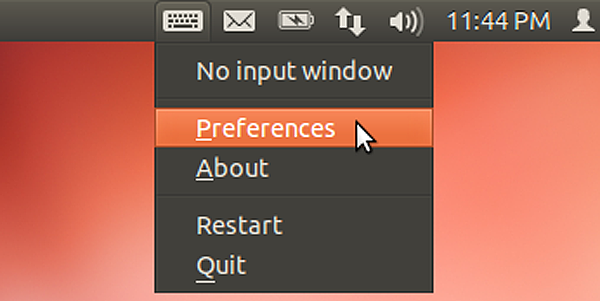
- Go to
Input method, selectCustomize active input methodscheckbox
Select an input method -> Bengali -> Avro- Now Click
Addbutton to add Avro to the list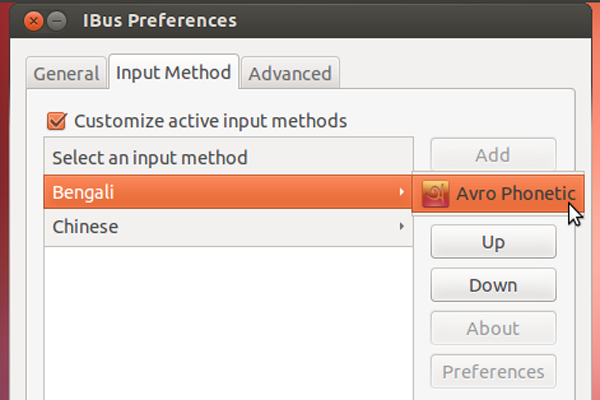
- Now restart IBus from the top panel icon (
Right Click -> Restart)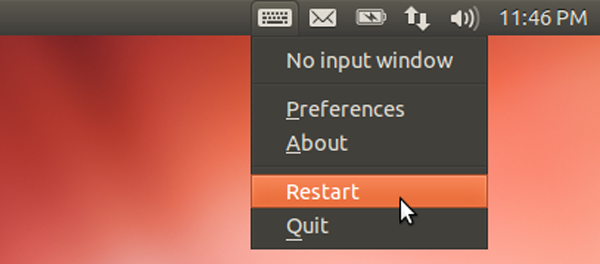
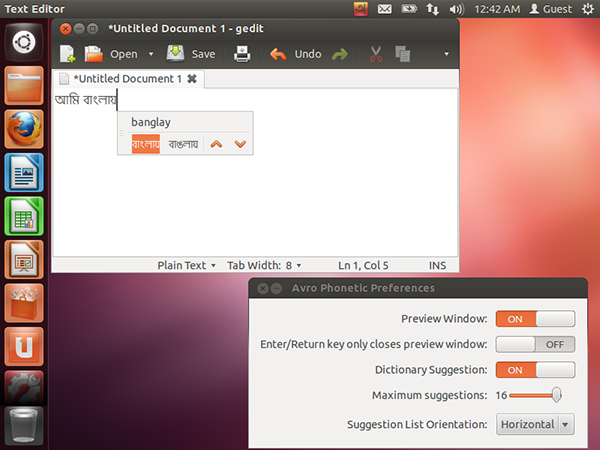
- Open any text editing software (like,
gedit). Now PressCtrl+Spaceto toggle between English and Avro (Bengali) - Enjoy Avro Phonetic!
Setting IBus as default input method
You may want to set IBus as your default input method so that it starts automatically every time you log in.-
Run Input Method Switcher (
im-switch) from Dash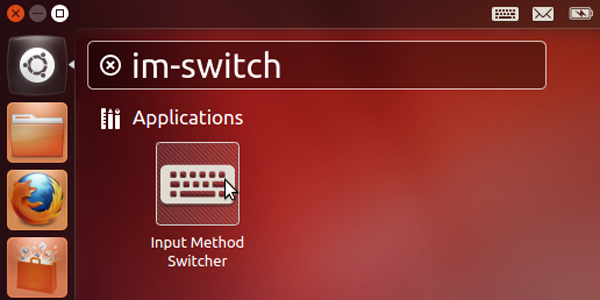
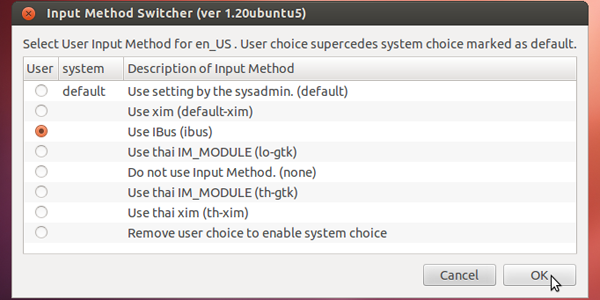
-
Select IBus
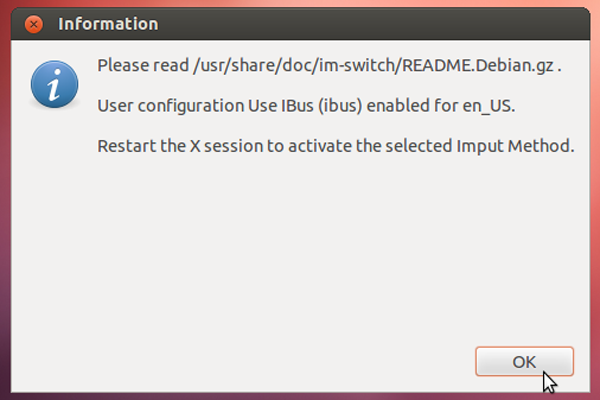
-
The following message will be shown. Log out and log in again.
Uninstalling ibus-avro
Step 1: Open Terminal and enter the following command:sudo apt-get remove ibus-avro-quantal
Step 2: Restart IBus.
Installing ibus-avro on Ubuntu 12.04:
To install Avro keyborad under Ubuntu 12.04, you can follow the preveous steps by replacing "
home:/sarimkhan/xUbuntu_12.10" with "home:/sarimkhan/xUbuntu_12.04" wherever required and to install it you have to replace "
sudo apt-get install ibus-avro-quantal" with "sudo apt-get install ibus-avro" .
Tuesday, December 18, 2012
Ubuntu 12.10 ( Read Canonical ) forced me to migrate to XFCE from Unity / GNOME
I have been a GNOME fan since I started using Ubuntu in 2007. I actually liked the switch from 1.x
to 2.x, . But with the GNOME3 development, I was struggling to use GNOME. It forced me to use GNOME fall back session as my graphic card did not play well with OpenGL and GNOME3 Shell. I compromised with GNOME fallback mode and infact happy with it.
My experience went far worst with the introduction of Unity by canonical in their distribution. It was a pain to use on my low end notebook as the graphic card did not like it. Though I was ok with it till ubutnu 11.10 . But it forced me to find some alternative which works well on my notebook. I stared using Lbuntu but I did not like it either. Day to day computing was a pain. I unistalled unity and started using GNOME shell in fall back mode i.e GNOME classic mode.
But hold on , GNOME 3.8 will officially remove the fallback mode. This forced me again to search for alternative. Now I thought I will give a shot for XFCE ( read xbuntu ).
Once I started using xbuntu , my old notebook became new again. It performed so well. I played with XFCE desktop . It is lightweight , sleek , fast and less resource demanding.
I am now switching to XFCE. My notebook does not work
well with OpenGL, and thus don't work well with Gnome shell. I go to XFCE.
Which is much closer to the original Gnome experience, and very
productivity oriented..
In Gnome 2, it was a
lot about making things more usable as they are, a bit cleaner and more
efficient. With Gnome 3, it seems to be about experimenting with new stuff.
Which is why it keeps on breaking APIs all the time. For example themeing
GTK 3 is constantly broken; most of the themes available just don't work.
Similar Gnome Shell extensions - most of them work with exactly one version of
Gnome Shell
Well I am not blind haters of GNOME shell . But I feel it is broken now. The UI shift may the future of personal computing because the way the personal computing advancing. In near future , we may not use traditional keyborad and mouse. PC will be a touch only device. I think in those time, GNOME3 will be more appropriate. But for now , for my notebook XFCE is the choice. Good luck to GNOME3 ....
Wednesday, March 21, 2012
Huawei 1731 3G Modem unlocking
Hi, all
There seems to be a lot of community support for Huawei modem. To unlock , upgrade or downgrade firmware lots of support forums are on net. Here goes an very easy method to unlock your Huawei 1731 3g modem.
1. Download the universal Master Code generator.

2. Run it on windows pc.
3. Enter your IMEI no.
4. Click the calculate button.
5. Note down the flash code .
6. Download the E1731Update_11.126.15.00.00.B416.zip
7. Connect your modem to pc.
8. Extract the E1731Update_11.126.15.00.00.B416.zip and run it.
9. It will detect your phone and ask you the flash code.
10. Enter the flash code.
11. Wait untill the process is complete.
12. If the dashboard pops up automatically , exit it .
13. Once the flashing is done, remove the modem and connect it .
14. Now your modem is unlocked. You can now try a different sim card.
15. Set the correct apn name in the profile setiing and you are done.!
Remember this code generator supports multi brand. You can use it for ZTE , Huawei , LG and Nokia too.
Sunday, January 15, 2012
Windows 7 PC as hotspot
Make Your Windows Seven Laptop /NoteBook as your Personal WiFi Hotspot
I was using this feature on my Ubuntu Note Book from long back ( The package name is hostapd ). I was just wondering if there is any option for my folks using Windows 7. And lol, I never knew that this was a built in feature in Windows 7 if your WLAN card supports hostmode. "Hostmode" is a mode of operation which is a preliminary requirement of your WiFi hardware to used as Wifi Router.
The rest of the method is really easy and fun. Open a command prompt as administrator.

Then type :
netsh wlan set hostednetwork mode=allow ssid=Your-HotSpot-Name key=Your-Key keyUsage=persistent
This will create a virtual WiFi hotspot with your name (Replace "Your-HotSpot-Name" and "Your-Key" with your choice). But wait you can not find the hotspot from your other devices now.
So before you search the hotspot, you have to start the service. To start start the hotspot type in the command prompt ( previously you opened as administrator ) as follows.
netsh wlan start hostednetwork
This will start the virtual WiFi hotspot you have created. Now your other device can see the hotspot and connect to it.The I.P address will be obtained from built in DHCP server.
To share internet connection over the hotspot connection do the following. (This is one time setting only"
1. Go to Network and Sharing Centre.
2. Click on "change adapter setting ".
3. Right click on the adapter which is already connected to Internet.
4. Click on "Properties".
5. Click on "Sharing" Tab.
6. Click on "Allow other network users to connect through this computer's internet connection"
7. Select the Virtual WiFi network adapter .
8. Click Ok.

To stop your WiFi hotspot Type in the administrative command prompt as follows :
netsh wlan stop hostednetwork
Now all this things can be done by single click . You need to create two new shortcut as follows.
To Start Hotspot:
1. Right click on desktop. Chose "New---> Shortcut".
2. Type C:\Windows\System32\cmd.exe /c "netsh wlan set hostednetwork mode=allow ssid=Your-HotSpot-Name key=Your-Key keyUsage=persistent && netsh wlan start hostednetwork && pause" in location box.
3. Give a name of the shortcut eg "Start Hotspot".
4. Finish & Save it.
5. Right click on the newly created shortcut.
6. Click on the "Advance" under "Shortcut" Tab
7. Check the "Run this program as administrator"
8. Customize the icon as you want.


To Stop Hotspot:
1. Right click on desktop. Chose "New---> Shortcut".
2. Type C:\Windows\System32\cmd.exe /c "netsh wlan stop hostednetwork && pause" in location box.
3. Give a name of the shortcut eg "Stop Hotspot".
4. Finish & Save it.
5. Right click on the newly created shortcut.
6. Click on the "Advance" under "Shortcut" Tab
7. Check the "Run this program as administrator"
8. Customize the icon as you want.
Now whenever you want to share your internet over the wifi network as hotspot you have to just double click on the "Start Hotspot" shortcut and to stop it double click on the "Stop Hotspot" shortcut.
Have Fun.
I was using this feature on my Ubuntu Note Book from long back ( The package name is hostapd ). I was just wondering if there is any option for my folks using Windows 7. And lol, I never knew that this was a built in feature in Windows 7 if your WLAN card supports hostmode. "Hostmode" is a mode of operation which is a preliminary requirement of your WiFi hardware to used as Wifi Router.
The rest of the method is really easy and fun. Open a command prompt as administrator.
Then type :
netsh wlan set hostednetwork mode=allow ssid=Your-HotSpot-Name key=Your-Key keyUsage=persistent
This will create a virtual WiFi hotspot with your name (Replace "Your-HotSpot-Name" and "Your-Key" with your choice). But wait you can not find the hotspot from your other devices now.
So before you search the hotspot, you have to start the service. To start start the hotspot type in the command prompt ( previously you opened as administrator ) as follows.
netsh wlan start hostednetwork
This will start the virtual WiFi hotspot you have created. Now your other device can see the hotspot and connect to it.The I.P address will be obtained from built in DHCP server.
To share internet connection over the hotspot connection do the following. (This is one time setting only"
1. Go to Network and Sharing Centre.
2. Click on "change adapter setting ".
3. Right click on the adapter which is already connected to Internet.
4. Click on "Properties".
5. Click on "Sharing" Tab.
6. Click on "Allow other network users to connect through this computer's internet connection"
7. Select the Virtual WiFi network adapter .
8. Click Ok.
To stop your WiFi hotspot Type in the administrative command prompt as follows :
netsh wlan stop hostednetwork
Now all this things can be done by single click . You need to create two new shortcut as follows.
To Start Hotspot:
1. Right click on desktop. Chose "New---> Shortcut".
2. Type C:\Windows\System32\cmd.exe /c "netsh wlan set hostednetwork mode=allow ssid=Your-HotSpot-Name key=Your-Key keyUsage=persistent && netsh wlan start hostednetwork && pause" in location box.
3. Give a name of the shortcut eg "Start Hotspot".
4. Finish & Save it.
5. Right click on the newly created shortcut.
6. Click on the "Advance" under "Shortcut" Tab
7. Check the "Run this program as administrator"
8. Customize the icon as you want.

To Stop Hotspot:
1. Right click on desktop. Chose "New---> Shortcut".
2. Type C:\Windows\System32\cmd.exe /c "netsh wlan stop hostednetwork && pause" in location box.
3. Give a name of the shortcut eg "Stop Hotspot".
4. Finish & Save it.
5. Right click on the newly created shortcut.
6. Click on the "Advance" under "Shortcut" Tab
7. Check the "Run this program as administrator"
8. Customize the icon as you want.
Now whenever you want to share your internet over the wifi network as hotspot you have to just double click on the "Start Hotspot" shortcut and to stop it double click on the "Stop Hotspot" shortcut.
Have Fun.
Subscribe to:
Posts (Atom)